# Interface
In addition to adding behavioral features to Diagrams webapp graphs, Live plugin adds some Interface components in order to manage its features.
So there are 2 ways to use the plugin features:
- By manually editing the graph:
'Extras' > 'Edit Diagram...'then add by handLive Attributesingraph rootorLive nodes - Via the UI components added by the plugin, which then modify the diagram
Although these 2 ways are possible, we STRONGLY recommend that you use the UI.
Edit graphs by hand could break the Live plugin functioning.
In this doc, we assume that you use the UI components as we recommend you.

# Toolbar Buttons
Live plugin status buttons are added to the Diagrams webapp (opens new window) interface toolbar.
These components are used to manage the plugin operating state.
# ⏺︎ Start button
Starts graph periodic updates.
On first start, inits plugin by loading Live data.
Switches with Pause button in the interface according to current Live plugin operating status.
# ⏸ Stop button
Pauses graph periodic updates.
Switches with Play button in the interface according to current Live plugin operating status.
# 🔄 Reload button
Reloads data set stored in Live plugin.
If plugin operating state is on, it stops.
After data reload, a single update process is done.
# Live Format Panel
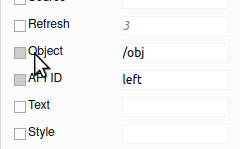
A Live tab is added to Diagrams webapp (opens new window) interface Format panel.
It allows to manage data sent to the plugin in order to ensure its proper functioning.
It is the place you can handle Live Attributes, Live Properties and handlers.
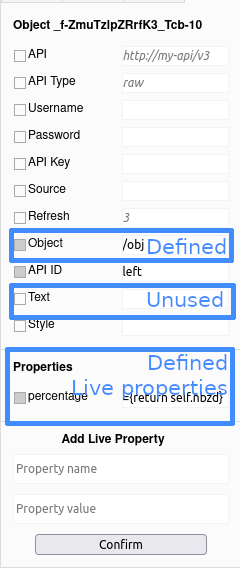
Live Format Panel allows to manage Live Attributes assigned to a Live node when this node is selected.
If no node is selected, Live Format Panel manages Live Attributes assigned to graph root.
# Add a Live Attribute
All available live attributes are listed in the Live Format Panel.
Fill the corresponding Live Attribute empty text zone in Live Format Panel to add a Live Attribute.
You can add a Live Attribute in a Live node when targeted node is selected.
You can add a Live Attribute in the graph root when no graph node is selected.
# Add a Live Property
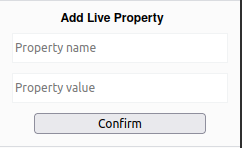
Fill the form available in the Live Format Panel when a Live node is selected to add targeted Live Property in this node
Validate with
Enter
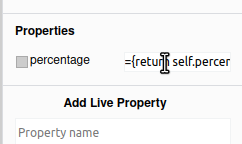
All Live Properties added to a Live node are listed in the Live Format Panel in the Properties sub-section when the node is selected.
INFO
Text, Tooltip & Style are special Live Properties: They are displayed as Live Attribute.
So to add one of these Live Properties do like Live Attributes:
Fill the text zone corresponding to the targeted Live Property.
# Add a handler
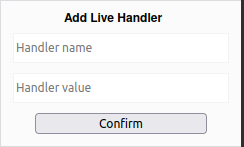
Fill the form available in the Live Format Panel when no graph node is selected.
All added handlers are listed in the Live Format Panel in the Handlers when no node is selected.
# Edit
Editing Live Attributes, Live Properties & handlers is done in the same way.
Select the text field of the element you want to edit. It opens a larger text area in which you can edit targeted Live Attribute value.
Validate your changes with Enter
WARNING
A UI bug prevents text selection with mouse in text areas.
For now, navigate in text areas with keyboard arrows & shortcuts:
↑↓←→arrows to move the cursorMaj+arrow keysto select textCTRL+Ato select all textCTRL+Cto copy selectionCTRL+Vto paste selection
The best approach is to write values outside the webapp & paste it in Live Properties values text fields.
# Delete
Deleting Live Attributes, Live Properties & handlers is done in the same way.
- Click on targeted Live Attributes, Live Properties or handlers name or on the corresponding box
- An alert box is displayed to ask for confirmation
- Validate
